 30-Day Money Back Guarantee

A new leather lifting belt should feel serious. Stiff edges, a firm body, and resistance through the buckle are normal - especially when the belt is built to stay locked in under heavy squats, deadlifts, and presses. The goal when you break in leather belts is not to make them soft like an old fashion belt. It is to shape the leather to your torso so your brace feels stronger, cleaner, and more consistent under load.
Rush the process and you can dry out the leather, weaken the structure, or create soft spots that make the belt less reliable. Break it in with intention instead. The result is gear that feels like it was made for your training.
Why a Leather Lifting Belt Starts Stiff
Quality leather is dense because it has a job to do. When you push your abdomen out against a lifting belt, that firm wall gives your midsection something to brace against. More tension around the torso can help you create the stability needed to stay controlled when the bar gets heavy.
That same density is why a fresh belt can feel rigid at first. It may sit flat instead of following your waist, pinch slightly around the edges, or feel awkward when you hinge into a deadlift setup. None of that means the belt is wrong for you, provided you chose the correct size and can position it properly.
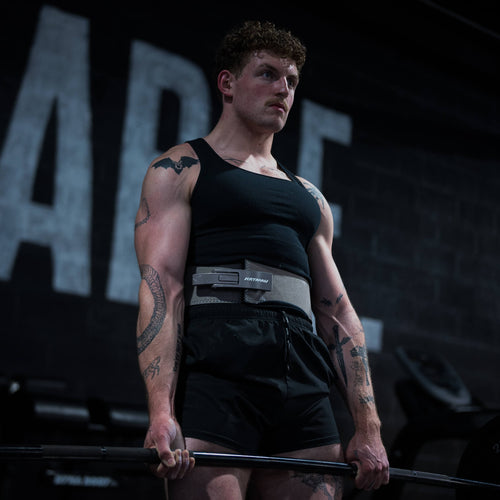
A lever belt can feel especially unforgiving out of the box because the leather and buckle system are designed for a secure, repeatable closure. It should become more natural over training sessions, not collapse into something floppy. Think fitted, not softened.
How to Break In Leather Belts Without Damaging Them
The safest method is simple: wear the belt during normal training and let heat, movement, and repeated bracing do the work. Leather responds best to steady use, not aggressive shortcuts.
Wear it for your warm-up sets
Do not save the new belt only for top sets. Put it on during your lighter squat, deadlift, overhead press, or accessory work, then take it off between movements if you do not need it. Start at a comfortable tightness. You should be able to take a full breath and push your core into the belt without fighting for air.
Over several sessions, the leather begins to follow the shape of your torso. This is the most natural way to build a belt that supports hard bracing without feeling like a slab around your waist.
You do not need to wear it for every exercise. A belt is a tool for high-output work, not a costume piece you need cinched down for curls. Use it where it helps you brace and practice setting it consistently.
Flex the belt by hand between sessions
A little controlled hand flexing can speed up the process. Hold the belt near the buckle and gently curve it in both directions along its length. Work section by section rather than sharply folding one spot. The idea is to encourage movement in the leather, not create creases that could become weak points.
Pay attention to the area that wraps around your sides and back. Those sections usually need to conform most to your body. Keep the buckle area and any screw holes free from excessive bending, particularly on a lever belt.
Five minutes here and there is enough. If you are trying to force the belt into a U-shape, you are doing too much.
Adjust the fit before judging the belt
Many lifters assume a belt needs more break-in when the real issue is fit. For a prong belt, test one hole looser and one hole tighter across different lifts. Your ideal setting for squats may not be the same as your ideal setting for deadlifts, depending on your stance, torso position, and how much you can expand your abdomen.
For a lever belt, adjust the lever placement if the closure is either painfully tight or too easy to lock. The best fit is firm enough that you can generate pressure into the leather, but not so tight that you cannot establish a full brace. If closing the lever requires a fight every time, do not force it. Move the lever one setting looser and reassess.
Correct placement matters, too. Some lifters prefer the belt slightly higher for squats, while others set it lower for deadlifts. Find the position that lets you hit depth or hinge cleanly without the belt jamming into your ribs or hips.
Give it time under real training conditions
Most leather belts feel noticeably better after a handful of training sessions. For a thick, structured belt, it can take several weeks of consistent use before it feels fully dialed in. That is not a flaw. It is the cost of equipment designed to hold its shape through serious work.
Training frequency, belt thickness, body shape, and lift selection all change the timeline. Someone who squats and deadlifts twice a week will break in a belt faster than someone who only uses it on a single heavy day. There is no prize for rushing it.
What Not to Do to a New Leather Belt
A belt that feels stiff can tempt you into questionable fixes. Skip the water soak, the washing machine, and the extreme heat. Saturating leather can cause it to dry unevenly and become brittle. Hair dryers, radiators, and leaving it in a hot car can strip moisture from the material and shorten its lifespan.
Avoid rolling the belt into a tight coil or folding it hard over a chair. Those moves may make it feel more flexible in the moment, but they can leave permanent stress lines. Never smash the belt with weights, hit it with a hammer, or drag it across rough surfaces. That is not breaking in gear. That is breaking down gear.
Heavy oils are another common mistake. Leather conditioners have a place, but a new lifting belt usually does not need to be saturated with product. Too much conditioner can darken the leather, make it overly soft, and affect how cleanly the belt holds its structure. If the leather genuinely feels dry after extended use, apply a very small amount of leather-safe conditioner to a hidden area first and follow the product directions.
Know the Difference Between Break-In and a Bad Fit
A break-in period should improve comfort without changing the belt's core function. You may notice less edge pressure, smoother buckle operation, and a better curve around your waist. You should still feel solid support when you take a deep breath and brace.
Persistent sharp pain, major pinching, restricted movement that never improves, or a buckle that cannot be set to a usable tension points to a fit or setup issue. No amount of flexing will turn the wrong size into the right one. Check your waist measurement against the sizing guidance, and measure where you actually wear the belt rather than relying on your pant size.
The same goes for expectations. A lifting belt is not meant to replace bracing skill. Learn to stack your ribs over your pelvis, breathe into your abdomen and sides, then create pressure against the belt. The belt gives your brace a stronger surface to work against. You still create the brace.
Keep Your Belt Ready for the Long Run
Once your belt starts feeling broken in, protect that fit. Let it air out after training instead of sealing it sweaty inside a gym bag. Wipe off chalk, dust, and surface sweat with a dry or lightly damp cloth, then store it flat or gently curved in a cool, dry place.
Check the hardware occasionally. On lever belts, make sure screws are secure and the lever closes cleanly. On prong belts, inspect the holes and stitching for unusual wear. A premium belt should earn character from hard sessions, not from neglect.
Your belt does not need to look brand new forever. It should look trained in. Scuffs, subtle shaping, and a leather curve that matches your torso are signs that it has shown up for the work with you.
A properly broken-in leather belt becomes one less thing to think about before a heavy set. Set it, breathe deep, brace hard, and let the work speak.
