

 30-Day Money Back Guarantee

Ready to take your deadlift belt game to the next level in 2025? Elite lifters use proven strategies to get stronger, safer, and more confident with every rep. This guide breaks down the latest science and expert techniques to help you master the deadlift belt, from choosing the right gear to using it for max performance. Discover when and why to use a belt, how to wear it correctly, avoid common mistakes, and learn advanced tips for every training level. Get ready to boost your lifts and protect your back with actionable advice you can use in your next session.
Why Use a Deadlift Belt? Science & Benefits
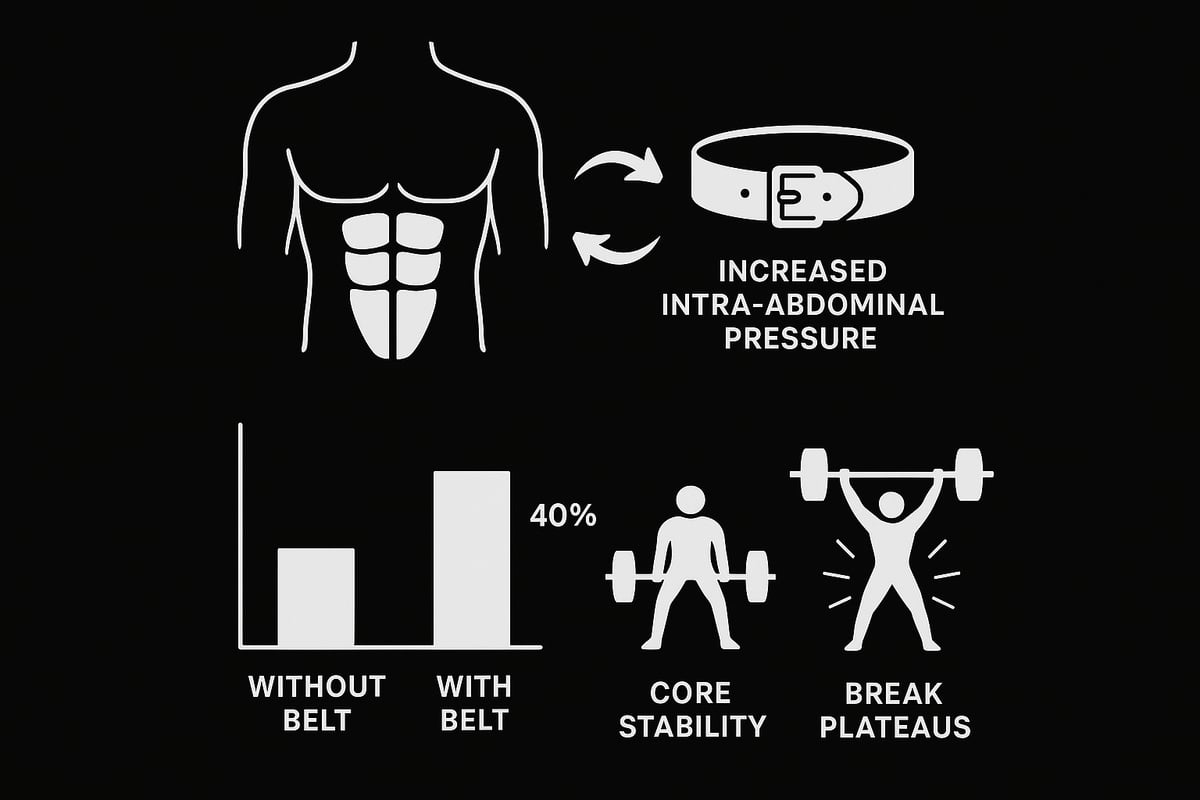
Enhanced Intra-Abdominal Pressure and Core Stability
Wearing a deadlift belt is more than just a powerlifting tradition—it’s a science-backed way to boost your core stability and protect your spine. By increasing intra-abdominal pressure, the deadlift belt acts like an external brace, letting you create a solid foundation for heavy pulls. Research shows that lifters can experience up to 40% more core stability when using a belt correctly.
This added support often helps break through stubborn plateaus. Many athletes find that, after adding a deadlift belt to their routine, they can safely increase their max lifts by 10-15%. For a deeper dive into the mechanics and benefits, check out this Weightlifting belt overview.
Injury Prevention and Lower Back Protection
Another major benefit of the deadlift belt is its role in injury prevention. Heavy deadlifts put immense stress on the lumbar spine. The belt acts as a safety net by reducing shear forces, helping keep the lower back in a safe, neutral position.
Studies have shown that experienced belt users see a lower rate of back injuries compared to those who lift raw. Competitive lifters often credit the deadlift belt for their longevity in the sport, using it as a tool to avoid long-term setbacks. In short, using a belt smartly can make heavy training safer for your back.
Performance Gains and Confidence Under Load
Beyond the physical support, a deadlift belt provides a psychological edge. When you feel stable and secure, you approach heavy lifts with more confidence. This mental boost can be the secret ingredient to hitting personal records and pushing your limits.
Athletes across all levels have reported setting new PRs soon after adopting a consistent deadlift belt strategy. Whether you’re training for competition or just want to get stronger, the right belt can help you lift more and feel better under the bar. Both competitive and recreational lifters stand to gain from this extra layer of support.
When NOT to Use a Deadlift Belt
However, the deadlift belt isn’t a magic fix for every set. You should avoid using it during warm-ups, high-rep technique work, or any session focused on building foundational core strength. Relying on the belt too early can limit your raw stability and slow down progress in the long run.
A great strategy is to reserve the deadlift belt for your heaviest sets or max attempts. This way, you’ll develop strong bracing mechanics and a resilient core, while still benefiting from the belt’s support when it matters most. Listen to your body and use the belt as a tool—not a crutch.
Types of Deadlift Belts & How to Choose in 2025
Picking the right deadlift belt can feel overwhelming with so many options on the market. Whether you're a first-time buyer or looking to upgrade, understanding the different types and how they fit your training style is key. Let's break down the most popular choices and what to look for in 2025.
Overview of Belt Types
When it comes to deadlift belt options, three main styles dominate: lever, prong, and velcro/quick-lock. Each has unique strengths for different lifters and training environments.
Here's a quick comparison:
| Belt Type | Pros | Cons | Best For |
|---|---|---|---|
| Lever | Fast to put on/off, very secure | Less adjustable mid-set | Powerlifting, max lifts |
| Prong | Highly adjustable, reliable | Slower to adjust, can pinch | Traditional lifters |
| Velcro/Quick | Lightweight, easy adjustability | Less support, wears faster | CrossFit, beginners |
Choosing the right deadlift belt style depends on your goals, comfort, and the type of lifting you do most.
Material & Construction Quality
The material and build of your deadlift belt directly impact its feel and lifespan. Leather belts are prized for their durability, firm support, and classic look. With proper care, a quality leather belt can last over 5 years.
Synthetic belts, often made from nylon or similar materials, are typically lighter and require less break-in time. However, they might not offer the same rigid support as leather, especially under maximal loads.
Pay attention to details like double stitching, buckle quality, and consistent width throughout the belt. These factors make a big difference in comfort and reliability during heavy deadlifts.
Sizing and Fit: Getting It Right
Finding the right fit for your deadlift belt is crucial. Always measure your waist at the point where you plan to wear the belt, not your pant size. Belt width matters too—10mm belts offer flexibility and comfort, while 13mm belts provide extra support for heavy lifts.
Incorrect sizing is one of the main reasons lifters experience discomfort or poor performance. If you need more detailed guidance, check out Choosing the Right Lifting Belt for expert tips on finding your perfect fit.
Gender, Body Shape, and Training Style Considerations
Your body type and preferred lifting style can influence which deadlift belt suits you best. Women often prefer belts with a slightly narrower width for better comfort and fit, while men may opt for wider belts for increased support.
Sumo deadlifters sometimes choose a lower belt position to avoid hip impingement, while conventional lifters stick with a classic waist placement. For bodybuilding or recreational lifting, a more flexible belt can provide enough support without restricting movement.
Think about your torso length, waist shape, and whether you prioritize mobility or maximum stability when making your choice.
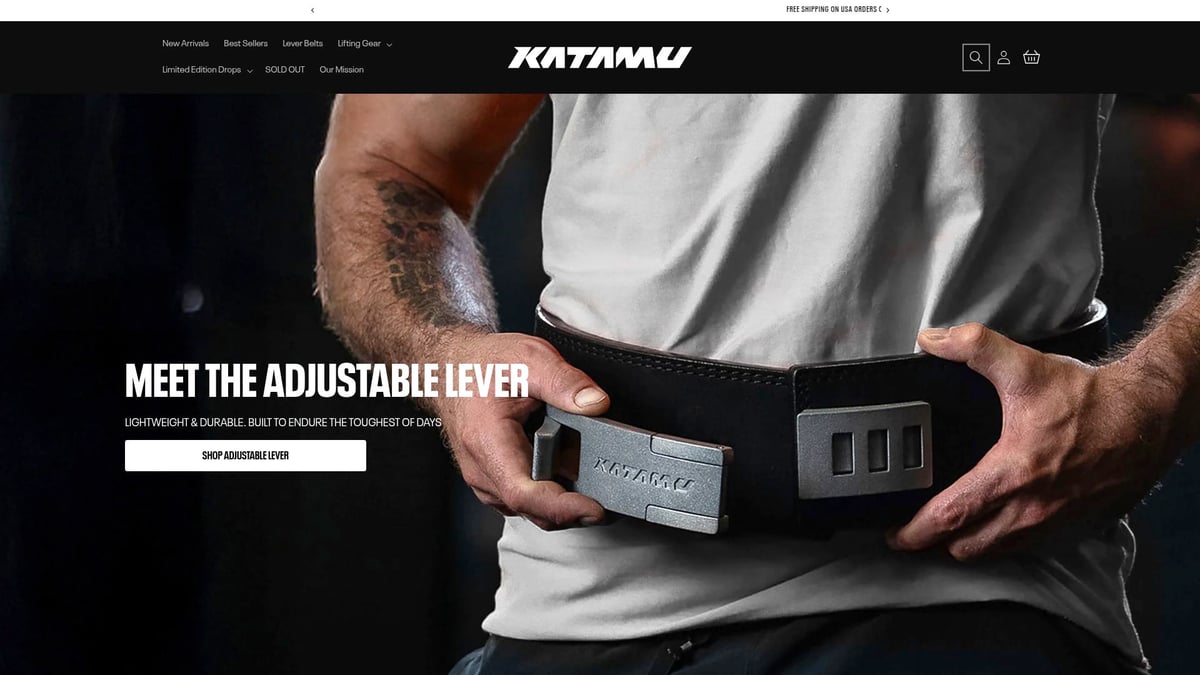
Katamu: Premium Lever Belts for Every Lifter
Katamu’s lever belts stand out for their blend of style, durability, and user-friendly features. The quick-adjust lever system allows for fast changes between sets, which is perfect for busy training sessions.
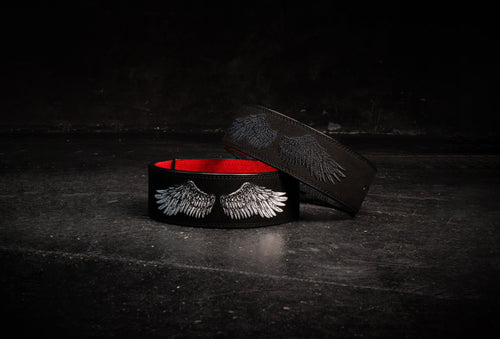
Made from premium materials, Katamu belts are designed to last, with artistic finishes that let you express your personality in the gym. Lifters report improved confidence and stability under heavy loads, thanks to the secure fit and supportive design.
Katamu also offers bundles that include knee sleeves, wrist wraps, and duffle bags, making it easy to gear up for a complete lifting experience.
2025 Trends: Smart Belts and Tech Integration
Looking ahead, smart deadlift belt technology is on the rise. Some newer models feature tracking sensors and auto-adjusting buckles to optimize support during each lift.
Are these innovations worth it for the average lifter? For most, a well-made traditional belt covers all the essentials. However, tech-savvy athletes and data-driven trainers may appreciate the extra feedback and customization smart belts provide.
No matter your experience level, choosing a deadlift belt that fits your needs and preferences is the best way to support your performance in 2025.
How to Wear a Deadlift Belt: Placement & Tightness
Wearing your deadlift belt correctly is essential for both performance and safety. Whether you are a beginner or an experienced lifter, understanding proper placement and tightness can make all the difference in your lifts. Let us break down each step to help you get the most out of your deadlift belt.
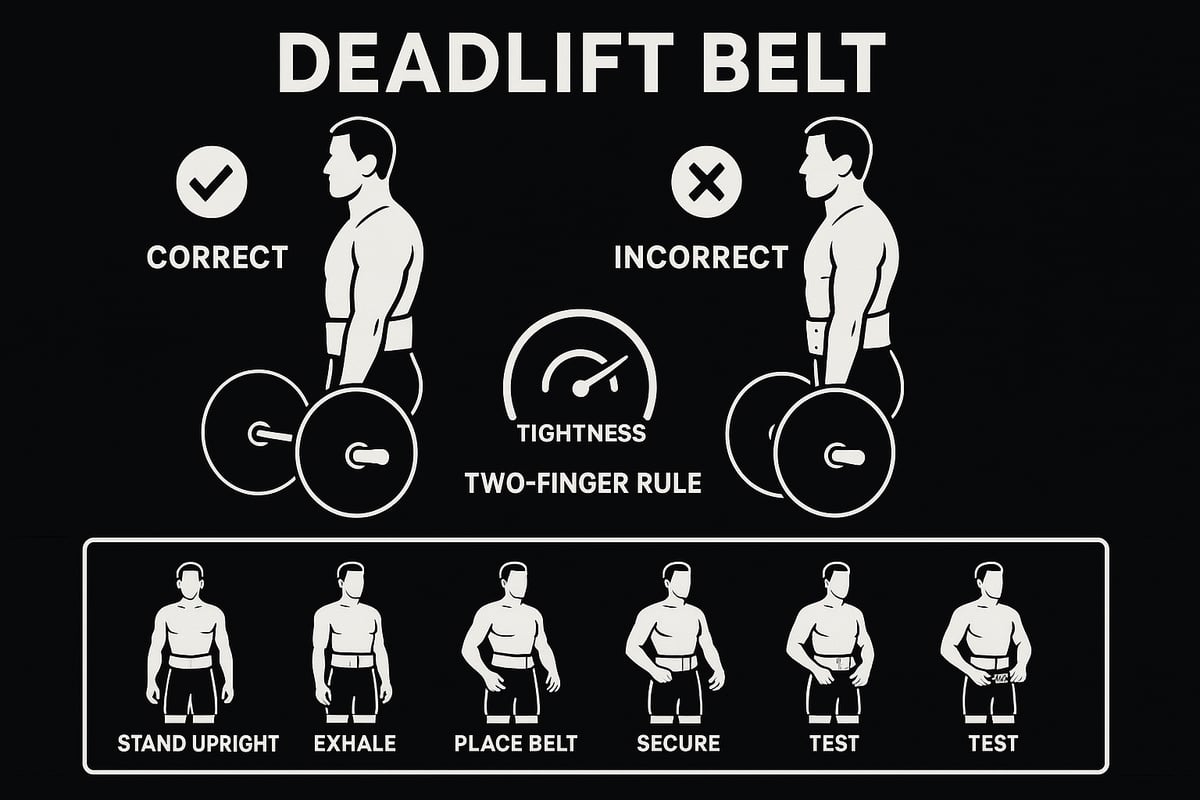
Finding the Correct Belt Position
The position of your deadlift belt can dramatically affect your lift. For most lifters, the belt should sit just above the hip bones and below the ribcage. This allows for maximum abdominal expansion and support.
If you pull conventional deadlifts, place the deadlift belt so it covers the lower abdominals without digging into your ribs. Sumo deadlifters often wear the belt slightly lower to prevent hip impingement. Experiment with small adjustments to find the spot where you can brace hard and move freely.
Determining the Right Tightness
A deadlift belt should be snug but not suffocating. The “two-finger rule” is a handy way to check: you should be able to slide two fingers between the belt and your torso.
If the deadlift belt is too tight, it may restrict breathing and reduce your ability to brace. Too loose, and it will not offer support. Signs of overtightening include bruising or difficulty taking a deep breath. If your belt shifts during lifts, it is likely too loose.
Step-by-Step Guide to Putting On Your Belt
Follow these steps for consistent setup every time you use your deadlift belt:
- Stand tall and exhale completely.
- Place the belt around your waist at the chosen height.
- Secure the buckle or lever, using the two-finger rule for tightness.
- Test your bracing and mobility before you lift.
Avoid common mistakes like wearing the deadlift belt over bulky clothing or skipping the breathing check. For additional guidance, you can refer to Powerlifting Belts - How to Choose the Best One for Your Lifts, which covers essential belt setup tips.
Adjusting for Body Type and Lift Variation
Your build and deadlift style will influence how you wear your deadlift belt. Lifters with short torsos may find better support with a slightly higher placement, while those with long torsos might prefer the belt lower for more core engagement.
For block pulls or deficit deadlifts, tweak the belt position to avoid pinching or movement restriction. Bodybuilders and powerlifters may also adjust the belt for accessory work to maintain comfort and effectiveness during varied lifts.
Visual Examples and User Feedback
Visual cues can help you master deadlift belt placement. Correct placement means the belt stays level, does not dig into your ribs, and does not ride up as you pull. Incorrect placement often leads to discomfort, reduced power, or bruising.
Experienced lifters report that experimenting with the deadlift belt position and tightness pays off. Many found that small tweaks led to stronger, safer pulls and better overall performance.
Bracing and Breathing: Expert Techniques for Belted Deadlifts
Unlocking the full power of your deadlift belt starts with mastering bracing and breathing. Most lifters know a belt adds support, but few realize how crucial proper technique is for maximizing its benefits. Let’s break down the science and art behind effective bracing, so you can lift heavier, safer, and with more confidence.
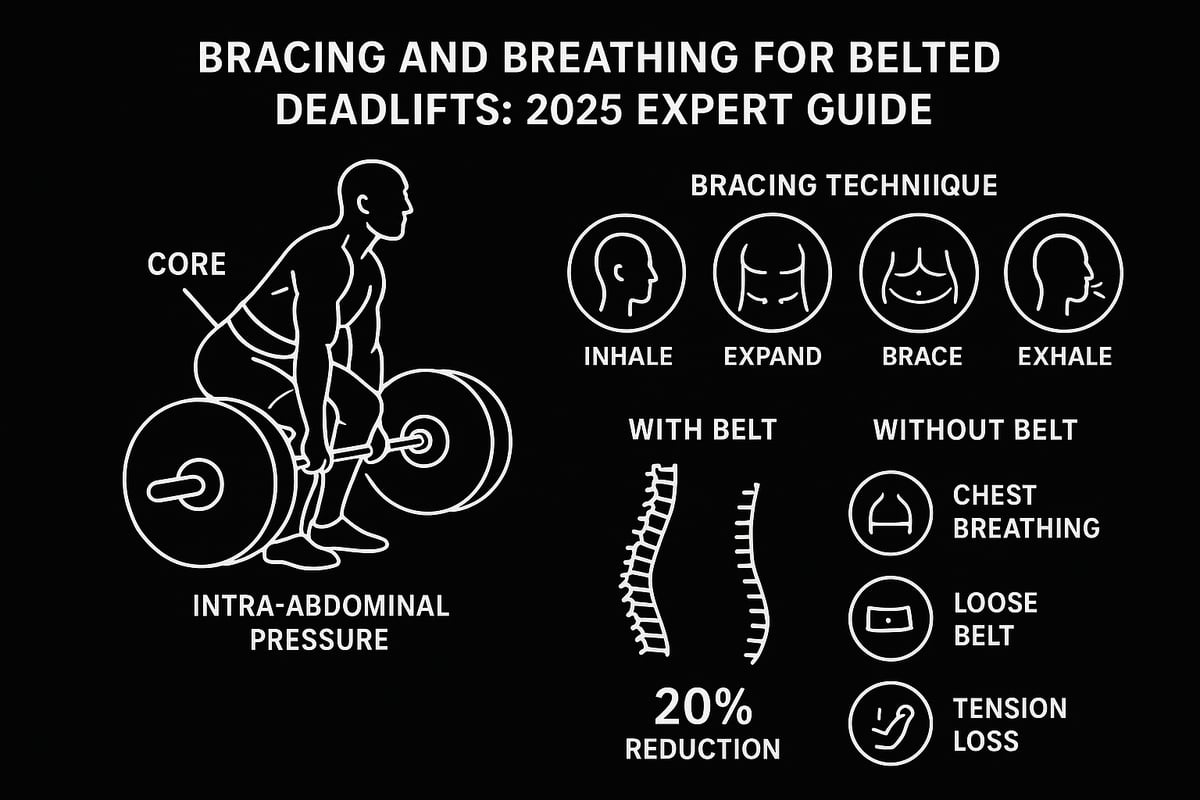
The Science of Bracing With a Belt
A deadlift belt works by increasing intra-abdominal pressure, helping your core stabilize the spine under heavy loads. When you brace correctly, your abs, obliques, and lower back push outward in all directions, creating what’s called “360-degree expansion.” This pressure acts as an internal weightlifting belt, while your actual deadlift belt gives something solid to push against.
Research shows that using a deadlift belt with proper bracing can reduce spinal compression by up to 20 percent. This means your body absorbs less stress when lifting maximum weights. The style and construction of your belt also play a role. If you’re curious about how different belts affect bracing, check out this Types of Weight Lifting Belts: Guide to Different Lifting Belts for a deeper dive into materials and design.
Step-by-Step Bracing Technique
Bracing for a deadlift belt is a skill you can train and refine. Here’s a simple process to follow every time you set up:
- Stand tall with the deadlift belt secured at your waist.
- Inhale deeply through your nose, sending the air into your belly, not your chest.
- Push your abdomen and sides out against the belt, feeling it tighten all around.
- Maintain this pressure as you initiate and complete the lift.
- Only exhale after locking out the rep and returning the bar safely to the ground.
This method ensures your core stays tight and stable, reducing injury risk and boosting performance.
Common Bracing Mistakes and Corrections
Even experienced lifters make errors with their deadlift belt that limit its effectiveness. Here are the most frequent mistakes and how to fix them:
- Chest breathing instead of belly breathing, which fails to create enough pressure.
- Letting tension drop mid-lift, especially at the sticking point.
- Wearing the belt too loose or too tight, which either reduces support or restricts breathing.
To correct these, focus on slow, controlled breaths into your abdomen before each rep. Always check that your deadlift belt is snug, allowing room for your core to expand but not so tight that you can’t breathe deeply.
Drills and Cues for Mastery
Perfecting your deadlift belt bracing takes practice. Try these drills and cues to build muscle memory:
- Stand with your back against a wall, press your lower back flat, and practice expanding your belly outward.
- Use a resistance band around your waist to feel outward pressure as you brace.
- Watch your form in the mirror to ensure you’re not lifting your chest.
- Use cues like “brace like you’re about to be punched” to trigger proper engagement.
Progress by practicing bracing without a deadlift belt first, then add the belt once you can maintain tension consistently.
Advanced Bracing for Maximal Loads
When chasing a personal record, advanced bracing techniques can make the difference. Double bracing involves taking an initial breath and brace before getting set, then a final brace just before pulling. This maximizes intra-abdominal pressure for your all-out attempts with the deadlift belt.
For high-rep sets, adjust your breathing pattern. Take a full breath and brace for each rep, resetting between lifts if needed. Mastering these advanced strategies with your deadlift belt ensures stability, power, and safety even under the heaviest loads.
Common Deadlift Belt Mistakes and How to Avoid Them
Using a deadlift belt can transform your lifts, but only if you avoid common pitfalls. Even experienced lifters sometimes struggle with proper belt use, leading to discomfort, missed gains, or even injury. Let’s break down the most frequent deadlift belt mistakes and how to sidestep them for safer, stronger pulls.
Wearing the Belt Too High or Low
Placing your deadlift belt too high on your torso or too low near the hips can drastically affect leverage and comfort. When worn on the ribcage, the belt may dig in and restrict breathing, while sitting too low can cause it to shift during lifts. The ideal position is across the lower abdomen, just above the hip bones, allowing maximal bracing without impeding movement.
A helpful tip is to experiment with minor adjustments during warm-ups to find the sweet spot for your body and deadlift style. For more insight on proper belt placement and choosing the ideal type, check out Choosing the Right Belt for Powerlifting.
Overtightening or Undertightening
A deadlift belt should be snug, but not so tight that it restricts breathing or bracing. Using the “two-finger rule” helps: you should be able to slip two fingers between your body and the belt. Overtightening compresses the core and reduces intra-abdominal pressure, while a loose belt won’t provide support.
Signs of incorrect tightness include difficulty taking a deep breath or the belt shifting during a lift. Always test your setup before heavy sets to ensure you’re getting the right level of support and comfort.
Relying on the Belt Too Early in Training
Many beginners rush to use a deadlift belt before mastering foundational core strength and technique. This can hinder long-term progress, as the body misses essential adaptations. Early over-reliance on a belt may mask weak points and lead to poor mechanics.
Focus on beltless training during warm-ups and lighter sets, gradually introducing the deadlift belt only for heavier loads or max attempts. This approach builds resilience and ensures you benefit from the belt when you truly need it.
Skipping Technique Practice
Deadlift form should always come before gear. Some lifters put on a deadlift belt and neglect refining their setup, grip, and pull mechanics. The belt can sometimes hide technical flaws rather than fix them.
Prioritize regular technique drills, video analysis, or coaching feedback. Only add the deadlift belt after you’re confident in your movement patterns. This prevents bad habits and keeps your lifts efficient and safe.
Neglecting Belt Maintenance and Hygiene
Ignoring deadlift belt care can lead to skin irritation, unpleasant odors, and even belt breakdown. Sweat, chalk, and friction wear down materials over time. Clean your belt with mild soap and let it air dry after each use.
Store it flat or hung up to prevent warping. Quality belts, like those from trusted brands, will last longer and perform better with proper care. Learn more about a company's Mission and Quality Commitment to ensure you’re investing in durable gear.
Ignoring Individual Differences
Every lifter has a unique build, training style, and comfort preferences. A deadlift belt strategy that works for one person may not suit another. Factors like torso length, hip width, and deadlift variation all play a role in optimal belt use.
Listen to your body, adjust placement and tightness as needed, and don’t be afraid to experiment. Personalization is key to getting the most out of your deadlift belt and staying injury-free.
Advanced Tips & Programming for Belted Deadlifts in 2025
Ready to elevate your deadlift belt strategy in 2025? This section covers advanced programming, integration across variations, and how to combine the deadlift belt with other gear for peak performance. Explore periodization, troubleshooting, and future-proofing your approach for every training level.
Periodizing Belt Use for Maximum Gains
To maximize strength and muscle growth, periodizing your deadlift belt use is essential. Alternate between beltless and belted training to build raw core strength while harnessing the performance edge of the deadlift belt for heavier lifts.
A common approach is a 4-week cycle:
| Weeks | Approach | Belt Use |
|---|---|---|
| 1–2 | Volume/Technique | Beltless |
| 3–4 | Intensity/PRs | Belted (top sets) |
This method helps prevent over-reliance on the deadlift belt and ensures your core remains strong and resilient. Adjust the ratio based on your goals, but always focus on quality movement first.
Integrating Belts Into Different Deadlift Variations
The deadlift belt can be adapted for sumo, deficit, block pulls, and RDLs. For sumo deadlifts, position the belt slightly lower to avoid hip impingement. For deficits, keep the belt snug but not restrictive, as the range of motion is greater.
Block pulls and Romanian deadlifts benefit from a moderate belt position, supporting the lumbar spine without limiting mobility. Test placement and tightness for each variation, as small adjustments can make a big difference in comfort and performance.
Deadlift Belt Programming for Different Training Levels
Programming your deadlift belt use depends on your experience. Beginners should first master technique and build core strength with minimal belt use. Once foundational skills are solid, introduce the deadlift belt for top sets or testing max effort.
Intermediates can use the deadlift belt for heavier sessions, focusing on progressive overload. Advanced athletes may reserve the deadlift belt for PR attempts or competition prep, often cycling its use to keep the body adaptable.
Accessory Gear: Maximizing Belt Benefits
Pairing the deadlift belt with the right accessories enhances stability and confidence. Knee sleeves, wrist wraps, and lifting straps are popular choices. For grip support, consider reading about the benefits of good wrist straps to understand how they complement your deadlift belt use.
When selecting straps, check out top deadlift strap recommendations for the best options to pair with your setup. Combining these tools can boost your performance and help keep injuries at bay.
Belt Use in Competition Settings
In powerlifting or strongman meets, deadlift belt regulations vary. Always check federation rules for belt width, material, and allowed accessories. Pre-competition, inspect your deadlift belt for wear and ensure the buckle or lever is secure.
Develop a consistent belt ritual before each attempt to build confidence. Many lifters find that a familiar setup routine reduces anxiety and sharpens focus on the platform.
Troubleshooting Plateaus and Sticking Points
If your progress stalls, evaluate your deadlift belt technique. Adjusting belt position or tightness can help you break through sticking points. For example, a slightly higher or lower placement may improve leverage at lockout or off the floor.
Review your bracing and breathing mechanics, as even small lapses can limit performance. Sometimes, alternating between beltless and belted sets reignites adaptation and helps smash through PR plateaus.
Future-Proofing Your Training: Adapting to New Research
Stay current with evolving best practices and deadlift belt technology in 2025. Smart belts with sensors and adaptive features are emerging, but assess if these upgrades truly fit your needs and budget.
Regularly review scientific findings and expert recommendations to refine your strategy. Adapt your deadlift belt programming as research evolves, ensuring your approach remains effective and safe for years to come.
You’ve now got the science, tips, and real world strategies to deadlift smarter and safer in 2025. If you’re ready to put these techniques into action, the right belt can make all the difference—especially when it fits your style and delivers the kind of rock solid support that lets you push for new PRs with confidence. At Katamu, we believe every gymgoer deserves premium gear that feels as good as it looks and actually lasts. So if you want to take your training to the next level, Build your setup with a belt that’s made for lifters like you.
